A fair number of kitchen gadgets reside in our cupboards and drawers. We do use most of them (I rarely--or at least, no longer--buy gadgets just because they're gadgets), but some rank higher in my heart than others.
A particular gadget that is currently near and dear is our Kitchen-Aid ice-cream maker. We keep the bowl in our extra freezer at all times. It fits right into the mixer stand and whips up soft serve in under half and hour.
The big downside to most ice-cream recipes is the amount of time from start to finish. With a custard-based recipe, there's the cooking time and then it has to go back into the fridge to cool off completely before it can be put into the ice-cream maker.
Enter the no-cook ice-cream recipe. With this, you can be eating soft serve in about 30 minutes. The basic recipe: 1 cup whole milk, 3/4 cup sugar (though you could go with less), 2 cups cream, a little vanilla extract. Whisk the milk and sugar together, add the cream and extract, throw into the mixer for about 25 minutes. Once you've dished out what you want of the soft serve, put the rest into a container to ripen in the freezer.
Being the kind of cook I am, I improvised a chocolate version. And since we didn't have whole milk, I started with 1/2 cup of 2% and 1/2 cup of 1/2 and 1/2. I whisked this with a generous portion of some chocolate syrup we have on hand and a little cocoa powder plus a scant 1/4 cup of sugar. Then I added the cream and extract and continued as above.
I packed one of our food-storage containers completely full and put it in the freezer. With the rest, I made an ice-cream cone for Scooter and a small bowl for myself. Scooter didn't care for his, possibly due to the texture--he generally eats harder ice cream. Trillian happily finished it off for him.
Kind of like the truffles, it's almost dangerous that this is so easy to make. But it sure will be a nice, quick treat this summer.
Wednesday, July 15, 2009
Sunday, June 28, 2009
Chocolate chip cookies--don't tell him they're good for them
I've been craving carbs lately, particularly of the sort I haven't tried since going gluten-free. Biscuits, English muffins, bagels. I'm still working on finding recipes for these that will work. I tried to make bagels once, but they wouldn't hold together in circles and just weren't very appetizing. And I need English muffin rings before I try those. But I think I have found the answer to my biscuit craving.
I just found a gluten-free baking mix over at Ginger Lemon Girl. Since we were having unseasonably cool weather, I mixed some up today in preparation for some baking.
Despite all my savory cravings, I ended up making two sweet dishes. The Almond Joy pie is in the oven right now, so I can't comment on it yet. But this afternoon, while Scooter was at a playdate, I mixed up some of the Secret Chocolate Chip Cookies. (I followed her recipe very closely, so head over there for the details.) Their big secret? Zucchini. Oh, and all sorts of whole grains: the brown rice and oat flour from the baking mix, additional oats, and ground flax meal.
Scooter was in a bad mood, particularly with me, when we got home from the playdate, so he wouldn't initially take me up on my offer of chocolate chip cookies. But while I was working in the den (in a flurry of printing and faxing), he accepted Trillian's offer and ate three of them.
I tried a few (or 6) for myself and agree that they are wonderfully delicious.
These are going to become a household staple. And now I'm going to be looking for a few more gluten-free recipes to stuff with veggies!
Thursday, June 25, 2009
A simple celebratory dinner
Before I headed back to Springfield after running a number of errands, I decided to stop by Whole Foods--not because we needed anything in particular, but because I needed to use the restroom, happened to be nearby, and know that they keep their facilities nice and clean. (Should not have had the large soda!)
But I figured I should call Trillian up and see if she could think of anything I should pick up. She suggested I decide on something for dinner and mentioned that she would always be happy with some pastry or dessert item.
As I headed in, I thought about what a good day it had been. No big surprises. Just that Trillian's contract for her new job was on its way, and some other things were coming together. So it seemed like a day worth celebrating.
After making a beeline to the facilities and with my plan formed, I headed to the bakery section, picking up individual sweet treats for each of us. And then to the meat counter, where I found NY Strip Steaks on sale.
It's been too hot to do a lot of cooking here, so I knew I'd be using the grill. For the steaks, I salted and peppered liberally. And then I chopped up a bunch of vegetables we had on hand (from our CSA box): a potato and onion, a couple zucchini, some celery and carrots. These I sprayed with a little olive oil and some salt and pepper.
I should have started the veggies about 10 minutes before the steaks, but everything turned out wonderfully. (We even had some steak left over, which I sliced up to put on salads.) It's really amazing how the simplest of spices can bring out the best in good food. I had thought about creating a marinade for both the meat and vegetables, but salt and pepper were the right choice.
A simple dinner to celebrate the pleasure of a day that has us moving in the right direction.
Tuesday, May 12, 2009
The vegetable and fruit bin are so very full
Although Trillian and I are not locavores, we do try to shop at farmer's markets and choose other foods from nearby when possible. In other places we've lived, we've thought about joining a CSA. That's Community Supported Agriculture--the general idea behind it is that people buy memberships/shares from a local farm and in return receive a certain amount of produce, usually spread out over time.
We had considered one CSA in our area last year, but we would have had to go to Capital City for a mid-day, 2-hour window on a weekday to pick it up.
Then Trillian found a brochure for another CSA, one which would either deliver our box or allow us to pick it up at a local business during a 5-hour window. They also give us the option of committing for only 4 boxes and choosing an alternating week schedule, both choices we made for our initial foray.
An interesting aspect of this CSA is that they supplement their boxes with produce from other close-ish farms. This means that we get a greater selection of items in our box, including--this week--a few apples and oranges.
Most of the items this week were various greens, and I made a huge salad tonight, throwing in a little of this and a little of that. Even made my own vinaigrette, mixing in some green onions (from the box) and the herbs we're growing at home.
For the veggies I wouldn't usually buy, I'm diving into one of my favorite cookbooks: Vegetarian Cooking for Everyone. The section I refer to most often has an alphabetical listing of different vegetables, general information on each one, and then several recipes. Did you know you can cook turnip greens? I'll be giving them, and the turnips too, a try tomorrow.
For us, this is a fairly economical choice too. For the amount of produce we're receiving in a box, we wouldn't be able to buy the same things in a grocery store for much cheaper, especially with all the organics. And since I've decided to figure out a way to use every last bit, we'll definitely be getting our money's worth.
Tuesday, February 24, 2009
Black beans in the crockpot
I really need to write a separate post on the challenges of cooking at altitude, but for now let me address one specific problem: getting beans fully cooked. This has become a goal of mine, since beans are one of the few foods (tomatoes are the other) I continue to use in canned form and I remain very concerned about bisphenol-A. So I set out this past weekend to make it work.
I tried a crockpot refried bean recipe, but even though I cooked on low for 10 hours, the beans still weren't nearly soft enough and I lost patience. The short version of the problem is that water boils at a lower temperature here and just does not get as hot as I might need.
This time, I set out to give them as long as they needed. I just realized in looking for the refried beans recipe that Stephanie has black bean directions similar to mine, but I actually devised this on my own with some tweaks for the altitude.
I started with 1 1/2 pounds of dried beans from the Whole Foods bulk bins. They cost me just over $2.00 and were organic. I probably could have gotten a cheaper bag for around $1.00 per pound, but this seemed reasonable to me. In the end, I got a little more than 5 ziplocs with about 2 cups of beans. (I mashed up the extra 1/2 cup or so to make Scooter's black bean quesadilla.) Given that a can would usually cost me a little under $1.00, this was a good return.
The "recipe" itself is very straightforward. I started around noon, specifically so I could leave the beans overnight. I used my old 4-quart; the beans nearly filled it, but something about the cylinder shape struck me as better suited than my oval 6-quart. (By the way, I have absolutely no idea if there's any truth to that and I suspect that larger batches would be fine in the 6-quart.)
I've also got white, kidney, and garbanzo beans in the pantry, so you can bet I'll be doing this again. Just not tomorrow, as I'll be using some of my black beans in a delicious tamale pie.
I tried a crockpot refried bean recipe, but even though I cooked on low for 10 hours, the beans still weren't nearly soft enough and I lost patience. The short version of the problem is that water boils at a lower temperature here and just does not get as hot as I might need.
This time, I set out to give them as long as they needed. I just realized in looking for the refried beans recipe that Stephanie has black bean directions similar to mine, but I actually devised this on my own with some tweaks for the altitude.
I started with 1 1/2 pounds of dried beans from the Whole Foods bulk bins. They cost me just over $2.00 and were organic. I probably could have gotten a cheaper bag for around $1.00 per pound, but this seemed reasonable to me. In the end, I got a little more than 5 ziplocs with about 2 cups of beans. (I mashed up the extra 1/2 cup or so to make Scooter's black bean quesadilla.) Given that a can would usually cost me a little under $1.00, this was a good return.
The "recipe" itself is very straightforward. I started around noon, specifically so I could leave the beans overnight. I used my old 4-quart; the beans nearly filled it, but something about the cylinder shape struck me as better suited than my oval 6-quart. (By the way, I have absolutely no idea if there's any truth to that and I suspect that larger batches would be fine in the 6-quart.)
- Rinse beans and discard those that don't look right. The batch I had were really good and so I didn't have to discard many.
- Place beans in crockpot and cover with water. Let soak for 6-8 hours.
- Drain water, which will be dark. Add new water to a couple inches above the beans.
- Turn beans up to high. Most recipes I've seen keep the heat at low, but I think this was key for getting the beans up to a high enough temperature at altitude. I probably did this around 6 or 7 pm.
- Before bed, check water level and add some more if needed. Turn crockpot down to low. Go to bed. I did this around 10:30 pm.
- First thing in the morning, check beans again. This was 6:15 am for me. Add more water if needed--I didn't need to. I also turned the temperature back up again.
- At about 9 am, I turned the crockpot off and took the lid off to let the beans cool a bit.
- To speed the process of preparing the beans for freezing, I dipped some out, trying not to get too much liquid with them, into a mixing bowl so they'd be spread out a little more. Once they were cool enough, I put just under 2 cups into each freezer bag.
I've also got white, kidney, and garbanzo beans in the pantry, so you can bet I'll be doing this again. Just not tomorrow, as I'll be using some of my black beans in a delicious tamale pie.
Tuesday, February 17, 2009
Quick "baked" pear
On days when I have ballet in the evening, my eating schedule is, by necessity, a bit odd. I try to have something that's not too heavy just over two hours before class. And then I try not to snack anymore (which is really hard for me).
By the time I get home, it's 8:30ish, so a full dinner seems like too much. And after working out like that, it seems ridiculous to indulge in anything too extreme.
Tonight, I grabbed a few corn chips to satisfy the carb-desire, but I wanted something sweet and healthy. A baked pear sounded wonderful, but I didn't want to heat up the oven and then wait 30 minutes for a single piece of fruit.
So I used the microwave.
Ingredients:
(We'll ignore the fact that I also had a couple of Scooter's Valentine's Hershey's Kisses.)
By the time I get home, it's 8:30ish, so a full dinner seems like too much. And after working out like that, it seems ridiculous to indulge in anything too extreme.
Tonight, I grabbed a few corn chips to satisfy the carb-desire, but I wanted something sweet and healthy. A baked pear sounded wonderful, but I didn't want to heat up the oven and then wait 30 minutes for a single piece of fruit.
So I used the microwave.
Ingredients:
- One pear (I quartered it, cored the quarters, and then halved each of those)
- Cinnamon (optional)
- Put pear, cut into eight pieces, in microwave-safe bowl and sprinkle on cinnamon, if desired.
- Microwave for about a minute, then move pieces around.
- Microwave another minute or so.
(We'll ignore the fact that I also had a couple of Scooter's Valentine's Hershey's Kisses.)
Thursday, February 12, 2009
An easy anniversary meal
The Valentine's Day before Trillian and I started our relationship, mere days before, we looked through the special ads in our university newspaper and cackled over the mushy proclamations on a Hallmark holiday.
Now, with our anniversary so soon after the holiday, Valentine's Day feels a bit superfluous. We might do things like a fun dessert--any excuse for chocolate!--but we save our special meal for our anniversary. Sometimes we'll take the opportunity to try a particularly nice restaurant, but we've also been known to cook up a nice meal at home.
This year, I looked at the calendar and sighed. Not only is our anniversary on a weeknight, it's on the one night I have to take Scooter to Capital City for gymnastics. We'd be able to have a late-ish dinner, but the thought of starting to cook that late when I knew I'd be tired was not appealing.
And then the epiphany: why not a crockpot meal? I started to look through recipes I'd saved, but Trillian knew immediately what she wanted. It's a recipe I originally wanted to try because of how very simple it is: Sundried Tomatoes and Feta Tri-Tip. Even better, it tastes wonderful.
I'm planning on trying my hand at the crockpot creme brulee recipe a day or two earlier so that I can just broil it a little before dinner. And I'll serve the tri-tip with some of our frozen haricots verts. A fancy, satisfying meal with a minimum of preparation!
Sundried Tomatoes and Feta Tri-Tip
Ingredients:
- 2 pounds of tri-tip steak (it's a triangular cut from the sirloin butt--I don't remember exactly what cuts I've ended up using, but this has worked well with any cut I've tried.)
- 1 jar of sundried tomatoes, drained (I've also used some that were vacuum-packed without liquid and just threw in a tiny bit of oil.)
- approx. 8 ounces of feta cheese--or more, which is Trillian's preference
- 1/3 cup liquid (the recipe calls for white wine, I've used chicken stock successfully.)
- Put the meat in the crockpot, frozen is fine.
- Put the tomatoes on top of the meat, repeat with the feta. Toss in the liquid.
- Cook on low, 6-10 hours, depending on the thickness and frozen-ness of the meat.
Wednesday, February 11, 2009
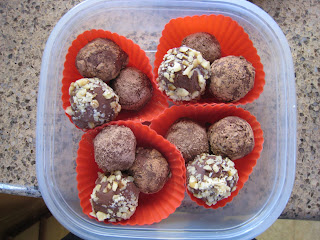
For my valentine: chocolate truffles
On most Saturday nights, we have dinner with my in-laws, cooked by my in-laws. Even though this coming Saturday is Valentine's Day, I kind of figured they didn't have plans to go out. Much like us, they're avoiding unnecessary expenses--and a nice meal out definitely qualifies. So we'll all be dining together. I offered to bring dessert, wanting to do some small thing to mark the day.
My first thought was chocolate. Not only because it's fairly traditional for Valentine's Day, but also because Trillian is a chocoholic. (And both of my in-laws also enjoy their chocolate.) I was going to go with fondue, but decided it would be hard to transport all the bits I'd need and would require cooking on the spot, possibly getting into others' way.
So I went with chocolate truffles. Seriously, what could be better than a good, dark chocolate truffle?
There are a lot of recipes out there and all sorts of opportunities to experiment with flavor. But at their base, truffles are cream and chocolate, a basic ganache. I found an "Easy chocolate truffles" recipe and went from there.

Ingredients:
 I had enough left over to set 3 aside for Trillian to have before Saturday.
And one to try right now. Smooth and chocolatey.
The dangerous thing is that they're not at all hard to make. Perhaps too easy. And we frequently have the basic ingredients on hand. Trillian's not at all opposed to this development.
My first thought was chocolate. Not only because it's fairly traditional for Valentine's Day, but also because Trillian is a chocoholic. (And both of my in-laws also enjoy their chocolate.) I was going to go with fondue, but decided it would be hard to transport all the bits I'd need and would require cooking on the spot, possibly getting into others' way.
So I went with chocolate truffles. Seriously, what could be better than a good, dark chocolate truffle?
There are a lot of recipes out there and all sorts of opportunities to experiment with flavor. But at their base, truffles are cream and chocolate, a basic ganache. I found an "Easy chocolate truffles" recipe and went from there.

Ingredients:
- A bit more than 1 1/4 cups of finely chopped chocolate. It was supposed to be 8 ounces, but I guesstimated. I cut a bunch off of a block of semi-sweet dark chocolate (the stuff in plastic wrap) and a little from the unsweetened Ghirardelli bar. I used a very sharp knife and found it cut the chocolate very nicely.
- 3/4 cup heavy whipping cream.
- 2 Tbsp butter.
- Whatever you want to cover the truffles.
- Cut the chocolate and place in a bowl that can hold at least twice as much as the chocolate.
- Heat the cream and butter in a small saucepan. Stir frequently to avoid scorching and to mix the butter in. You want to get it up to a simmer/low boil.
- Pour the cream mixture over the chocolate. Cover the bowl and let sit 5 minutes.
- Whisk the cream-chocolate mixture until it starts to thicken a little.
- Cover the bowl tightly and put it in the refrigerator. I left it there overnight.
- Prepare your dusting ingredients. I put some hot cocoa mix (also dark chocolate, the type that usually needs milk to prepare), chopped walnuts, and shaved chocolate (from the bar I used for the truffles themselves) on small plates.

- Scoop small amounts of ganache and roll into balls. I used our cookie-dough scoop. The truffles were a little big, but the scoop makes it easy and less messy.
- Roll the balls in the topping of choice. Set on parchment paper.

 I had enough left over to set 3 aside for Trillian to have before Saturday.
 And one to try right now. Smooth and chocolatey.
The dangerous thing is that they're not at all hard to make. Perhaps too easy. And we frequently have the basic ingredients on hand. Trillian's not at all opposed to this development.
Tuesday, February 3, 2009
My favorite shrimp recipe (plus chard)
For once, not a crockpot meal! So this requires cooking time in the evening, but it is so worth it! The trickiest part for me is remembering to put the shrimp into the fridge to thaw. (We always keep at least a pound there.) But a nice thing about shrimp is that it's so easy to defrost, even if you don't remember until a little before. Just put some cool water in the bag, change on occasion, until the ice is gone. Remove the shell, if still on, and pat dry.
In a skillet, heat oil--I use olive or safflower. Then I sprinkle in some chili flakes. We keep some dried chili that we got from the farmers' market and use this. Sometimes I throw in a couple cloves of garlic. Toss in the shrimp and squeeze (or pour, if you're using bottled) lime juice over the top. Scoot shrimp around, turn as necessary, until opaque.
What I usually do at this point is put the warm shrimp onto a plate and tent with aluminum foil. Because my favorite thing to serve as a side is sauteed chard. Using the same skillet as I used for the shrimp, I cook up the chard (which I have already washed and separated from the tough stalk), stirring it around until it's wilted. It picks up some of the chili (and garlic if in there) taste.
Serve up and enjoy. Try not to grab a few more shrimp as you walk by the plate.
Thursday, January 29, 2009
Lunch frustrations
I pack a lunch for Scooter four mornings a week; he has early release one day a week, so then I only pack a snack for recess-time (though I was so into the rhythm of packing a lunch that it took me half the year before I quit packing a full lunch on those days). Hot lunch is simply not an option since I have yet to see a single meal that would be gluten-free. Or, for that matter, that he would eat.
Most of the time, I'm at peace with what I send to school with him. Basically it ends up looking like a selection of snacks, packaged in a series of small containers and ziplocs. A usual lunch:
Sandwiches, the old standby of cold lunches, are a no-go. The only type Scooter will eat at home is grilled cheese, and that just doesn't travel well. He won't touch peanut butter. And, to be fair, the gluten-free bread just doesn't taste good untoasted. The one time I tried to include a hot dog in his lunch (sans bread), he screeched at me about giving him hot lunch when he didn't eat hot lunch.
On the plus side, we've been able to get him to eat eggs and breakfast meat in the mornings, good amounts even. And then we usually make a grilled cheese sandwich for him after school, so at least he's getting some calories.
Of course, after the afternoon grilled cheese, dinner can be an issue...
Most of the time, I'm at peace with what I send to school with him. Basically it ends up looking like a selection of snacks, packaged in a series of small containers and ziplocs. A usual lunch:
- 1-3 carbs. The usual suspects are Puffins Cereal, apple and cinnamon cereal, and pretzels.
- 1 fruit item. Slices of apple or pear, usually 1/2 of the piece of fruit. Recently, he's also allowed grapes.
- Cheese stick. He doesn't like string cheese, so these are cheddar (from Trader Joe's) or colby sticks.
- Orange juice.
- An occasional extra. He'll sometimes accept raisins and is definitely willing to have a cookie.
Sandwiches, the old standby of cold lunches, are a no-go. The only type Scooter will eat at home is grilled cheese, and that just doesn't travel well. He won't touch peanut butter. And, to be fair, the gluten-free bread just doesn't taste good untoasted. The one time I tried to include a hot dog in his lunch (sans bread), he screeched at me about giving him hot lunch when he didn't eat hot lunch.
On the plus side, we've been able to get him to eat eggs and breakfast meat in the mornings, good amounts even. And then we usually make a grilled cheese sandwich for him after school, so at least he's getting some calories.
Of course, after the afternoon grilled cheese, dinner can be an issue...
Monday, January 26, 2009
Eating my veggies
I'm going to hit two recipes in one post. I don't think I can dub either one as a go-to recipe, mostly because Trillian is not crazy about either one. Most of that is her general dislike of vegetables. (Side note: For the first almost-ten years of our relationship, I was a vegetarian and she most definitely was not. And once I'm done with the whole child-bearing thing, I plan on greatly cutting back on my meat consumption again. Interesting times.)
The first vegetarian recipe I tried from A Year of CrockPotting was the Vegetarian No Noodle Lasagna. It uses eggplant and squash as the 'noodles.' I've made it twice and go back and forth on the eggplant, both in this and in general, but I will probably make it again with just squash. I absolutely love the spinach and mushrooms in this (or in anything really). Just possibly, this is not one of Trillian's favorites since she is not a fan of mushrooms or cooked spinach. (Side note #2: While I was a vegetarian and still eating wheat, we made good use of two-pizza deals. My favorite combo of toppings for a very long time was mushroom and black olives. It would be hard for me to pick two things Trillian likes less on her pizza.)
The other vegetarian recipe I tried was Indian Spinach and Tofu. One of my favorite Indian dishes is palak paneer, and this seemed like it might satisfy that craving. I ate a lot when it was first ready, but didn't like how it tasted as leftovers. I'll be giving it another try with a few modifications. The tofu in particular did not hold up well, so I may either leave it out or keep it on the side--or maybe go with cheese. I've also seen potato cubes suggested. The chickpeas also didn't hold up well for me, so I'll likely leave those out (or make some hummus instead). And then I would seriously up the spices, but I enjoy a little bite.
So now the trick for me is to figure out some easy vegetarian recipes that will appeal to a non-veggie palate so that I can justify making them more than once in a blue moon.
Thursday, January 22, 2009
A fine cup of coffee

Ever the romantics, Trillian told me specifically what she wanted for Christmas. When I ordered her gift, I picked out something for myself and told her what she got for me. But frankly, it would be hard for us to go wrong when we're ordering from Sweet Maria's.
Trillian had been eying vacuum coffee brewers for a while. She decided on the Yama 8-cup, stove-top model.
On first reading the process of vacuum brewing, it can be a bit intimidating. For me, anything made of glass that could shatter immediately sends a number of nightmare scenarios running through my brain. But now that I've been roasting our coffee for a while though, I'm a little braver and willing to jump into new things.
The process is sort of fun to watch. The basics:
- Put filter into top section. Add ground coffee on top.
- Add water to bottom. (If it's pre-heated, the rest goes faster.)
- Fit the top part into the bottom so that a seal is created.
- Place on low flame. Wait until nearly all the water goes into the upper chamber.
- Let brew for a minute or so.
- Remove from heat and wait until the coffee funnels back into the bottom.
The directions point out that this coffee is likely to be a bit different from what one is accustomed to. It is 'cleaner,' in that there truly are no grounds left in it. The mouth-feel is soft and smooth, very pure.
This is the way we like to end our evenings now, with a pot of delicious decaf. Excuse me while I go pour another cup.
Wednesday, January 14, 2009
Cheesecake in the crockpot!
This is the recipe that first got me to go check out A Year of CrockPotting, even if I am only now getting around to it.
So in one of my time-wasting incarnations, I was spending a lot of time on a major newspaper's celebrity blog. Generally with online newspaper postings, I have a policy of not reading comments since they tend to make my blood boil after a very short time. This blog, however, is an exception, as the comments are often funny, even as they veer wildly off-topic. One day, there was some food discussion in the comments, and a regular mentioned she was having gluten-free cheesecake that she had made in the crockpot. And then she left the url.
In this recipe, the crockpot basically serves as a bain marie. I put off attempting it in my 4 quart, since the only cooking dishes that would fit into it were too small to be cheesecake-worthy. Now that I have my 6 quart, it seemed the perfect dish to try out (despite this whole trying-to-eat-better-and-get-in-shape thing).
Now a note about my version: There is no crust. Stephanie has instructions for it with the original recipe. I have also made a crust before by crushing up ginger snaps and mixing with melted butter. But... Cheesecake is something we've discovered Scooter will eat, except he always leaves the crust. AND I'm trying to avoid carbs (or so I say, but the slice of toast and rice I had at dinner tonight say otherwise). So I felt like a crust would be wasted--and those gluten-free cookies are not cheap enough to basically throw away.
Ingredients:
- 16 oz cream cheese, room temperature (I used two tubs, since they were on sale.)
- 3/4 cup white sugar
- 2 large eggs, room temperature
- 1/4 cup heavy cream (I let this get to room temperature too--not sure if it's necessary.)
- 1 tsp vanilla
- 1 Tbsp flour (I used brown rice flour)
Technically, I can't call this a go-to recipe since the whole point of that goal is to come up with easy dinner recipes. Don't get me wrong, I totally could eat this in place of a regular dinner, but the adult in me knows that this can only be a sometimes treat.
So in one of my time-wasting incarnations, I was spending a lot of time on a major newspaper's celebrity blog. Generally with online newspaper postings, I have a policy of not reading comments since they tend to make my blood boil after a very short time. This blog, however, is an exception, as the comments are often funny, even as they veer wildly off-topic. One day, there was some food discussion in the comments, and a regular mentioned she was having gluten-free cheesecake that she had made in the crockpot. And then she left the url.
In this recipe, the crockpot basically serves as a bain marie. I put off attempting it in my 4 quart, since the only cooking dishes that would fit into it were too small to be cheesecake-worthy. Now that I have my 6 quart, it seemed the perfect dish to try out (despite this whole trying-to-eat-better-and-get-in-shape thing).
Now a note about my version: There is no crust. Stephanie has instructions for it with the original recipe. I have also made a crust before by crushing up ginger snaps and mixing with melted butter. But... Cheesecake is something we've discovered Scooter will eat, except he always leaves the crust. AND I'm trying to avoid carbs (or so I say, but the slice of toast and rice I had at dinner tonight say otherwise). So I felt like a crust would be wasted--and those gluten-free cookies are not cheap enough to basically throw away.
Ingredients:
- 16 oz cream cheese, room temperature (I used two tubs, since they were on sale.)
- 3/4 cup white sugar
- 2 large eggs, room temperature
- 1/4 cup heavy cream (I let this get to room temperature too--not sure if it's necessary.)
- 1 tsp vanilla
- 1 Tbsp flour (I used brown rice flour)
- Find a baking dish that will fit into the bottom of the crockpot. I have an oval casserole dish (not sure of capacity) that fit with an inch or two gap all around.
- Mix ingredients together. I did this by hand, but will use our stand-mixer next time. There were a few cream-cheese lumps in the finished product, but it didn't affect the overall taste. Put this into the baking dish.
- Add some water to the crockpot, then carefully place the dish into it. I started with a cup, and ended up adding some more after putting the dish in (with a funnel stuck in the gap).
- Cook for 2-3 hours on high. Check at an hour or so. It's done when you touch it and don't get too much stuff on your finger. Mine cooked for just over 2 hours.
- Turn off crockpot, let sit for an hour or so, then put in fridge to set.
Technically, I can't call this a go-to recipe since the whole point of that goal is to come up with easy dinner recipes. Don't get me wrong, I totally could eat this in place of a regular dinner, but the adult in me knows that this can only be a sometimes treat.
Wednesday, January 7, 2009
Chicken Cordon Bleu
I tried out another crockpot recipe from A Year of CrockPotting: chicken cordon bleu. I will be making it again, but monkeying around with a few things, as ours turned out too dry. Which really surprised me, given the amount of liquid in there. I think that next time around, I will brine the chicken first--that's given us good results in other chicken dishes.

Ingredients: 4 chicken breast halves, pounded thin (I bought meat that had already been pounded; this was a huge time saver) 4 slices of ham 4-8 slices of swiss cheese (I used 6, 1 1/2 per half) can of cream-of-something soup + 2 Tbsp low fat milk (since most cream-of soups contain wheat, I used a portion of the homemade cream of mushroom soup I had in the freezer)

Ingredients: 4 chicken breast halves, pounded thin (I bought meat that had already been pounded; this was a huge time saver) 4 slices of ham 4-8 slices of swiss cheese (I used 6, 1 1/2 per half) can of cream-of-something soup + 2 Tbsp low fat milk (since most cream-of soups contain wheat, I used a portion of the homemade cream of mushroom soup I had in the freezer)
- Spray the crockpot with oil. I used my 4 quart so that it would be at least half full.
- Take one chicken breast, put a slice of ham on it, followed by swiss cheese.
- Roll breast up and place in crockpot, seam side down. I was able to fit two breasts in the bottom and then put the remaining two on top of those in the opposite direction.
- Cook on high for 4-5 hours or low for 8-10.
Monday, January 5, 2009
Pasta Fagioli
 Photos just don't do justice to stews, I suspect. And Blogger has rotated my photo for some reason.
I spend a lot of time in my physical kitchen, so I'm not sure why I let things slide here for so long. But since one of my goals for the year is to re-establish my presence here, you can look forward to more regular posting of recipes and other food-related topics.
My main gift this holiday season was a 6 quart crockpot, a desire I developed after discovering a great site, A Year of CrockPotting. And I figured, what better recipe to break it in than pasta fagioli; I knew as soon as Stephanie posted her recipe that I would have to make it sometime, since this soup has a history in our household.
I first discovered Trader Joe's when I moved away for grad school. It was a popular place to go for cheap but good eats (and wine) among my colleagues and I immediately understood why. Trillian and I found their pasta fagioli canned soup on a trip; it became a stock-up purchase at each subsequent visit. For about a dollar, we could have a tasty and filling lunch. At the time, I was still a vegetarian, though I have to admit that I don't remember checking to see if this used chicken broth.
While in Canada, we didn't have access to Trader Joe's, so we were looking forward to having one in Capital City after our move. It was one of the first places we went once the movers brought our stuff. Of course we headed to the soup section... only to discover that our favorite soup had been discontinued. Trillian still remarks on this every time we set foot in the store.
Now Stephanie's recipe is meant to copy Olive Garden's recipe, and it's definitely different than the TJ version. But I will be making this and variations on a regular basis! As soon as Trillian had a couple bites, she said, "Put this into the rotation!" (I'm trying to develop a list of go-to recipes that are easy and both Trillian and I like.)
Here's the recipe, adapted from A Year of Crockpotting. I kept to the basic structure she provided, but upped some of the veggies and omitted the salt (because the broth has plenty, in my opinion).
Ingredients:
1 pound lean ground beef, browned and drained
1 small red onion, chopped
2 medium carrots, chopped
3 celery stalks, sliced
2 cans (14.5 oz) diced tomatoes, undrained
1 can kidney beans, drained and rinsed
1 can white beans, drained and rinsed
4 cups beef broth
1 jar pasta sauce (no idea how many ounces, just a regular-sized jar)
generous shake of Italian Seasoning
a couple shakes of Tabasco sauce
black pepper to taste
a couple handfuls of dry pasta, to add at end of cooking time (I used Tinkyada brown rice fusilli)
- Brown the meat. Let cool while chopping vegetables.
- Chop up onion, carrots, celery.
- Add everything (except pasta) to the crockpot and mix a bit.
- Cook on low for 8 hours or high for 4 hours.
- Add pasta and cook on low for about another hour.
- Enjoy with parmesan, crusty bread, or whatever else sounds good.
This was much more tomato-based than the TJ version, but I'll happily use this recipe again. We've both enjoyed at least one bowl a day for the past three days, and I have several more servings frozen for later. If I want to get a little closer to our beloved version (and/or to make it vegetarian), I'll probably use vegetable broth, omit the beef and kidney beans, double up on white beans, and use elbow macaroni.
Subscribe to:
Posts (Atom)